Flutter Complete road map 2021 by mujahid
Flutter Complete road map 2021
Hi, me mujhaid Today Everyone learn flutter please follow this article step by step this blog divide into four section
Section 1: Learn Dart programming language link is below
Section 2:Flutter beginner :
Learn how to create fast and stunning mobile applications using Flutter, a new mobile framework by google. In this article, you will quickly learn how to build an application in Flutter with no previous experience. It is HIGHLY recommended you understand the Dart programming language.
Flutter Installation
In this section, we are going to learn how to set up an environment for the successful development of the Flutter application.
System requirements for Windows
To install and run Flutter on the Windows system, you need first to meet these requirements for your development environment.
| Operating System | Windows 7 or Later (I am Windows 10. You can also use Mac or Linux OS.). |
| Disk Space | 400 MB (It does not include disk space for IDE/tools). |
| Tools | 1. Windows PowerShell 2. Git for Windows 2.x (Here, Use Git from Windows Command Prompt option). |
| SDK | Flutter SDK for Windows |
| IDE | Android Studio (Official) |
Install Git
Step 1: To download Git, click here.
Step 2: Run the .exe file to complete the installation. During installation, make sure that you have selected the recommended option.
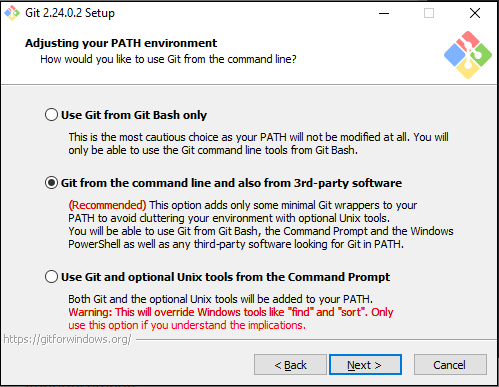
To read more information about installing Git, click here.
Install the Flutter SDK
Step 1: Download the installation bundle of the Flutter Software Development Kit for windows. To download Flutter SDK, Go to its official website, click on Get started button, you will get the following screen.
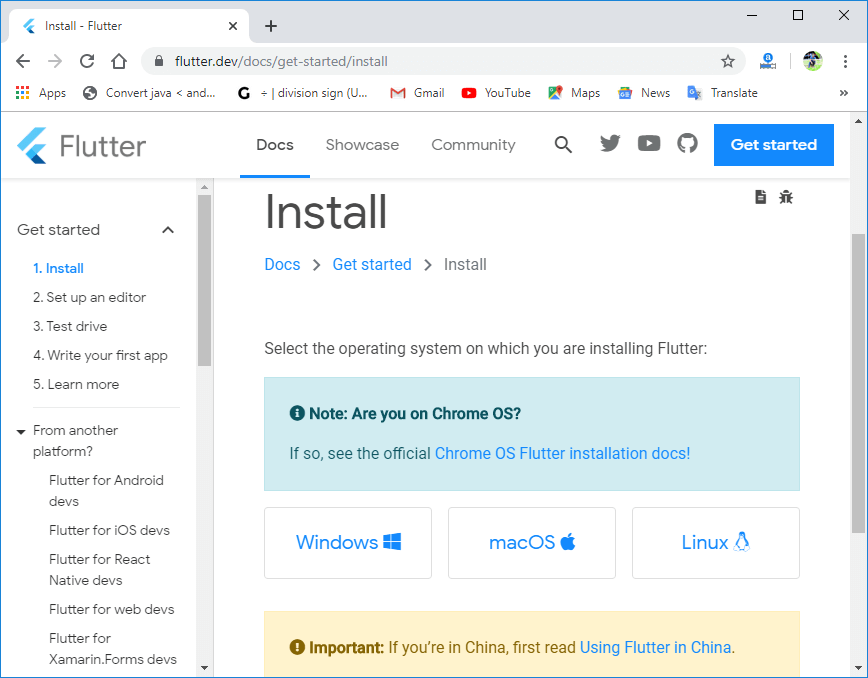
Step 2: Next, to download the latest Flutter SDK, click on the Windows icon. Here, you will find the download link for SDK.
Step 3: When your download is complete, extract the zip file and place it in the desired installation folder or location, for example, D: /Flutter.
Note: The Flutter SDK should not be placed where the administrator's permission is required.
Step 4: To run the Flutter command in regular windows console, you need to update the system path to include the flutter bin directory. The following steps are required to do this:
Step 4.1: Go to MyComputer properties -> advanced tab -> environment variables. You will get the following screen.
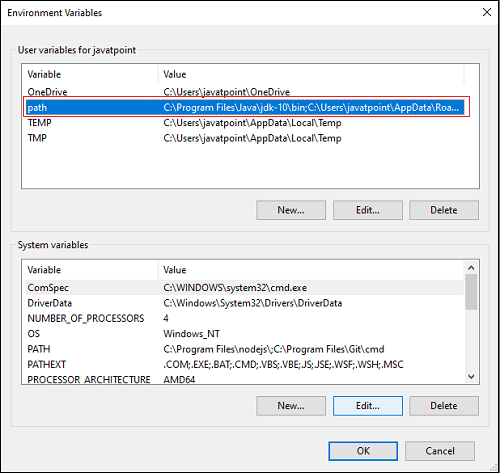
Step 4.2: Now, select path -> click on edit. The following screen appears.
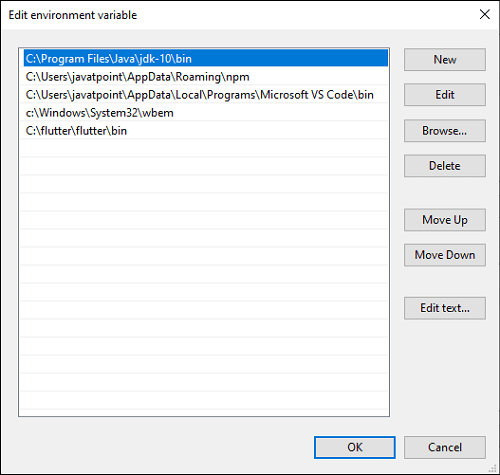
Step 4.3: In the above window, click on New->write path of Flutter bin folder in variable value -> ok -> ok -> ok.
Step 5: Now, run the $ flutter doctor command. This command checks for all the requirements of Flutter app development and displays a report of the status of your Flutter installation.
Step 6: When you run the above command, it will analyze the system and show its report, as shown in the below image. Here, you will find the details of all missing tools, which required to run Flutter as well as the development tools that are available but not connected with the device.
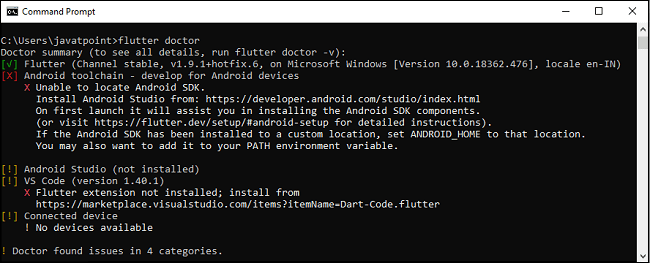
Step 7: Install the Android SDK. If the flutter doctor command does not find the Android SDK tool in your system, then you need first to install the Android Studio IDE. To install Android Studio IDE, do the following steps.
Step 7.1: Download the latest Android Studio executable or zip file from the official site.
Step 7.2: When the download is complete, open the .exe file and run it. You will get the following dialog box.
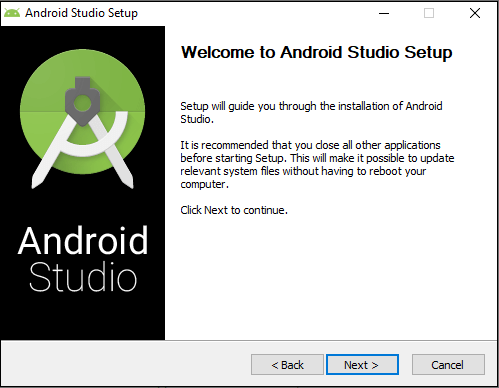
Step 7.3: Follow the steps of the installation wizard. Once the installation wizard completes, you will get the following screen.
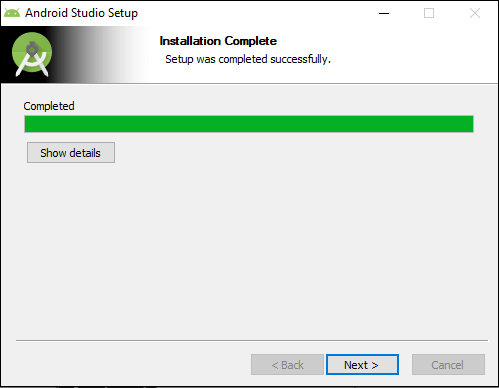
Step 7.4: In the above screen, click Next-> Finish. Once the Finish button is clicked, you need to choose the 'Don't import Settings option’ and click OK. It will start the Android Studio.
Note:> Meanwhile, the installation wizard also includes downloading Android SDK components that are required by Flutter for development.
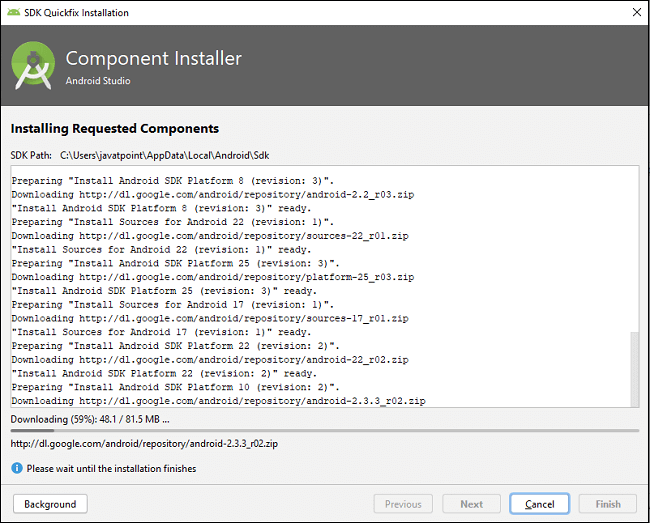
Step 8: Next, you need to set up an Android emulator. It is responsible for running and testing the Flutter application.
Step 8.1: To set an Android emulator, go to Android Studio > Tools > Android > AVD Manager and select Create Virtual Device. Or, go to Help->Find Action->Type Emulator in the search box. You will get the following screen.
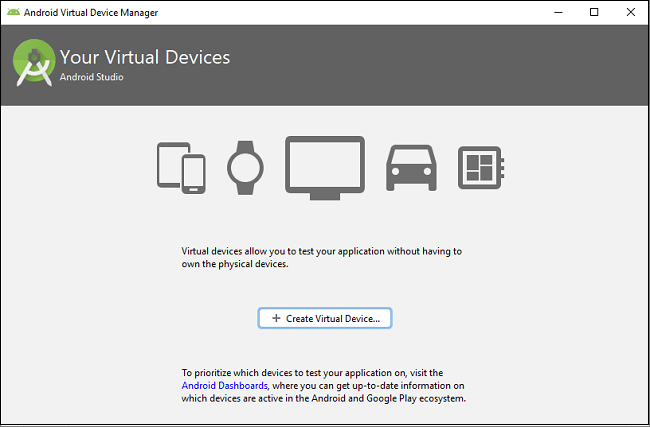
Step 8.2: Choose your device definition and click on Next.
Step 8.3: Select the system image for the latest Android version and click on Next.
Step 8.4: Now, verify the all AVD configuration. If it is correct, click on Finish. The following screen appears.
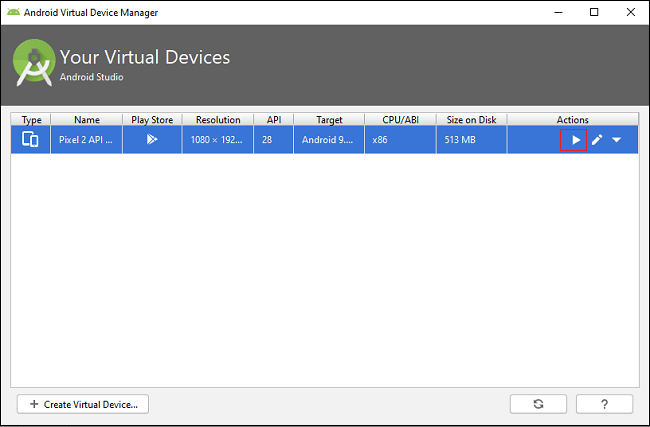
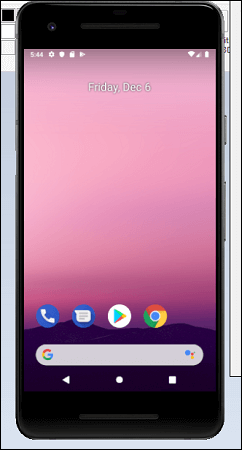
Step 8.5: Last, click on the icon pointed into the red color rectangle. The Android emulator displayed as below screen.
Step 9: Now, install Flutter and Dart plugin for building Flutter application in Android Studio. These plugins provide a template to create a Flutter application, give an option to run and debug Flutter application in the Android Studio itself. Do the following steps to install these plugins.
Step 9.1: Open the Android Studio and then go to File->Settings->Plugins.
Step 9.2: Now, search the Flutter plugin. If found, select Flutter plugin and click install. When you click on install, it will ask you to install Dart plugin as below screen. Click yes to proceed.

Step 9.3: Restart the Android Studio.
System Requirements for macOS
To install and run Flutter on macOS system, you need first to meet these requirements for your development environment.
| Operating System | macOS (64-bit) |
| Disk Space | 2.8 GB (It does not include disk space for IDE/tools). |
| Tools | bash curl git 2.x mkdir rm unzip which |
| IDE | Xcode (Official) |
Get the Flutter SDK
Step 1: Download the installation bundle of the Flutter Software Development Kit for macOS. To download Flutter SDK, Go to its official website.
Step 2: When your download is complete, extract the zip file and place it in the desired installation folder or location.
Step 3: To run the Flutter command, you need to update the system path to include the flutter bin directory.
Step 4: Next, enable the updated path in the current terminal window using the below command and then verify it also.
Step 5: Now, run the $ flutter doctor command. This command checks for all the requirements of Flutter app development and displays a report of the status of your Flutter installation.
Step 6: When you run the above command, it will analyze the system and the details of all missing tools, which required to run Flutter as well as the development tools that are available but not connected with the device.
Step 7: Install the latest Xcode tools if reported by the Flutter doctor tool.
Step 8: Install the latest Android Studio and SDK, if reported by the Flutter doctor tool.
Step 9: Next, you need to set up an iOS simulator or connect an iPhone device to the system for developing an iOS application.
Step 10: Again, set up an android emulator or connect an android device to the system for developing an android application.
Step 11: Now, install Flutter and Dart plugin for building Flutter application in Android Studio. These plugins provide a template to create a Flutter application, give an option to run and debug Flutter application in the Android Studio itself.
After installation and first project create in a flutter :
Cover this topic:
- Raised Button
- Raised Button with Parameters
- Flat Button
- Icon Button
Input Widget
- TextField
- Checkbox
- Switches
- Radios
- Slider
- Date Picker
Scaffold:
- Floating Action Button
- Drawer
- Bottom Navigation Bar
- Footer Buttons
Notification:
- Bottom Sheet
- Snack Bar
- Alert Dialog
- Simple Dialog
Layouts:
- Rows and Columns
- Card
- Expanded
- Listview Builder
Section 3:Flutter Intermediate
First complete the beginners, section. In this section, you will learn some of the more complex flutter widgets, along with using charts, navigation and routing, and state management from building your own to using Redux. I highly recommend you take my previous beginner section before attempting this one.
Cover this topic
- Widgets
- Tooltips
- Chips, keys and children
- Sliders and indicators
- PopupMenuButton
- Layout Widgets
- Expansion Panel
- TabBarView
- Stepper
- Gridview
- Chart
- Charts Introduction
- Grouping data
- Animated Pie Charts
- Custom widgets
- Creating a custom widget
- Stateful Widgets
- Widget within a widget
- Child to parent
- Navigation
- PushNamed
- PushNamedUntilAndRemove
- Push and Pop
- Navigating from a child widget
- State managment
- Global State
- Passing variables
- Redux
Section 4:Flutter Expert
This section learn step by step topic like graphics, animate widgets, use maps, phone integration such as permissions and the camera and how to work with firebase.
Cover this topic:
- Widget Graphics Manipulations
- Rotated Box
- Box Decoration
- Transformations
- Custom Painter
- Animations
- Tween Animations
- Animation builder
- Listener
- Animated Widget
- Maps
- Display a map
- Markers
- Map interactions
- Polylines
- phone integrations
- URL launcher
- Permissions
- Working with contacts
- Taking pictures with the camera
- Firebase Introduction and Authentication
- Firebase intro
- Project setup
- Flutter authentication
- Anonymous authentication
- Google authentication
- Firebase storage and database
- Firebase storage
- Firebase real time database
- Firebase database set vs update
- Firebase database find and findrange
Comments
Post a Comment